Home improvement
My Favorite Improvement Projects, maybe you to will be inspired to try something.
I always google for ideas on projects, so this is my way of giving back. E-mail me
if you any questions on how to do these and I'll try to help.
They start with the oldest one.... and work toward the newest ones... always busy in the summers.
Official
Vendors of
Coach Ketcham
Plumbing - Barton's Plumbing - (817) 656-2084
French Drains - Arandas' Landscaping -682-554-3256
Electrical - Darryl Copen (817) 307-9976
Blinds - Horizon Blinds - (817) 988-9707
General Construction - Pat Lloyd (817) 929-5271
Tile Place - Texas Tile on Denton Highway 817-503-8453
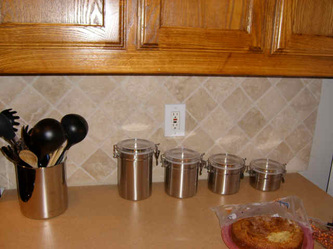
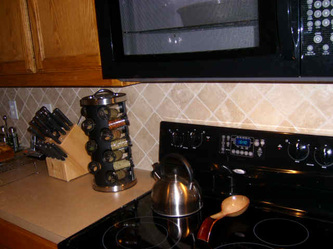
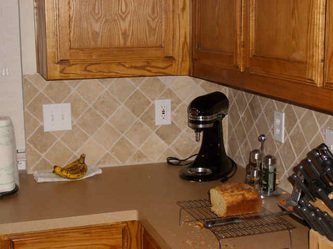
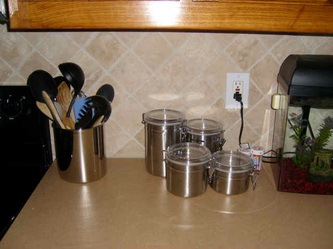
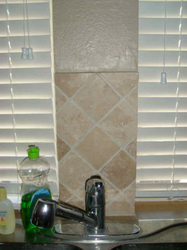
Fall 2008 - Backsplash
Project: Backsplash
Price: $300
Time: 1 ½ Days
Difficulty: Easy-Moderate
Tools Needed: Tile Saw, Mortar, ¼ Trowels, Sponge, Putty Knife, grout float, and
yard sticks
The wife and I check out the usual suspects for backsplash tile.
Lowes, Depot, and still couldn’t find what we like. We decided to go to Texas
Tile on Denton Highway (the old Brown’s Automotive.) We found very friendly,
intelligent, salesman, who happened to be the owner. They even came in after they closed to sell it to me.
I used a premixed mortar in white.
It blended into the tile if you got any on it and it was great to have premixed.
I know it is cheaper to mix your own, but it is a LOT easier to go premixed.
Before we started, we tore off the old backsplash. Then we spent the next 30 minutes planning out how we wanted to tile to lay.
With Jerry helping me doing the cutting on the great QEP 60089, 7" Portable Tile Saw
and I started spreading mortar with a ¼ trowel. I back butter most of the tile and used spacers for the first few feet, however, I quickly switched to a mostly eyeball method, and seemed to get better results. We did put yard sticks on the counter, laying flat and put the bottom tile on top of these. This allowed me to use a matching flexible caulk between the bottom tile and the countertop.
We started around noon and finished at about 7. The next day, I mixed a ½ a bag of grout and kept the rest in the attic. I applied it at 45 degree angles and the sponge the excess to get it nice and smooth. Took about 1
hour. I bought a cheap float and trowel so I could just throw them away when you are done. If you
have nice ones, I have heard if you cover them in WD40 before you used them, they clean very easy.
3 Years Later
– We love the backsplash. Money and time wellspent.
What I would do different - Turn off breaker from outlets in kitchen when I was grouting. OWW.
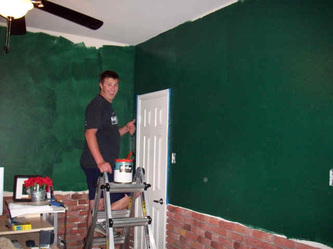
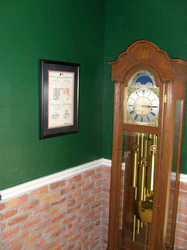
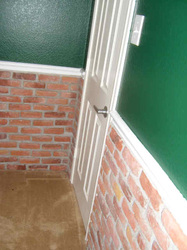
February 2008 - Brick in Office
February 2008 - Brick in Office
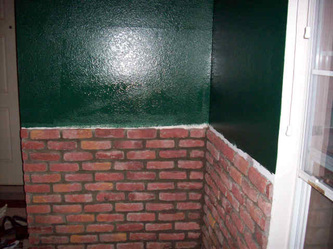
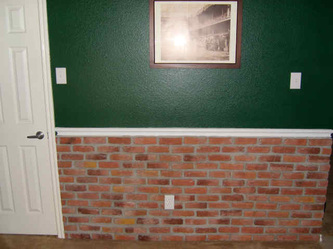
Project: Bricking inside the house
Price: $300
Time: 1 Week, off and on, but really 2 full day’s worth
Difficulty: Moderate
Tools Needed: Del Norte Antique Thin Brick, QUIKRETE Veneer Stone Mortar, Trowel, Zip Lock Bags, Knife,
SHOP VAC, Drop Cloth, Chair Rail, Nailer, Nails, Paint, Saw.
Trista and I wanted to do something fun in our office and the thought of a brick
and chair rail crossed our minds. First, I thought, brick paneling, but I
remember how cheap that looks. It never matches up and looks like real
brick PANELING. First we found an outdoor floor brick at Lowes, but it was
meant to be outside and looked a little too… stepping stone. So, we went to
Sutherlands and found the Del Norte we wanted. It looks like an old brick
building look.
We measure how high we wanted it, and began laying it out. I also pulled up all the baseboards. Of
course, Bruder Jerry was there to help out, like always. Jerry started doing cuts on the QEP 60089, 7" Portable Tile Saw, and I started mortaring. I used the old Pre-Mix mortar again. A little more expensive then the bag stuff, but overall, a MUCH better way to go. ¼ “Trowel and back buttered the pieces as I went. After we got the bricks set, we let them dry overnight.
Then I realized that we had a problem. How do you put the mortar between the bricks? I mean, normal bricks, you would use the mortar to do that, but the mortar is BEHIND these. I could have used a chicken wire behind these, and I thought about putting plywood with chicken wire on it over the drywall, but choose to put
it directly on the drywall. After much thought, I finally decided to mix the QUIKRETE Veneer Stone Mortar with the same amount of water and grout and put them in 1 gallon zip lock bags. I mix it together in the bag, and
then I cut the corner and used it as a grout bag. It worked and 25 bags later, it was done. I wore rubber gloves, and put the QUIKRETE Veneer Stone Mortar on the wall, and then used my finger to smooth it out.
3 Years later - We love the brick and chair rail. I’m glad we did it. The bricks gave the room a
cool texture.
What I would do different - In hindsight, I would have put bought electrical box extenders and put them in before I cut all the brick. I also would have started on the wall behind the furniture
that no one sees
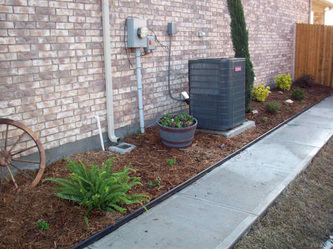
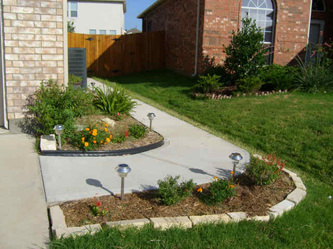
Sidewalk
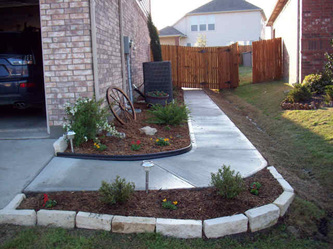
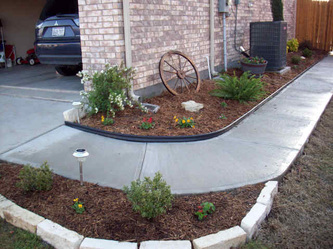
Spring Break 2008 - Side Walk
Project: Sidewalk
Price: $500
Time: 1 FULL WEEK
Difficulty: HARD
Tools:Needed: Roundup, 4 Wheelbarrows, several shovels, enough wood for forms, duplexnails, floats, broom, rake, edging tools, concrete, and friends that owe you (labor.)
People Used: Bruder Jerry, Janice, Bruder Kevin, Dad, Matt, Daddy Lay and Jonathan for
the pore and Tre' and dad for the digging.
Cost: about $500 and a week worth of a LOT of LABOR.
Overall: Jerry helped me get the grading and the layout perfect. I then spent the next 5
days digging and removing the yard. Worked on forms and then I had to add some sand, which I purchased from a concrete company. I used about 1 yard of sand. Sigh, then more labor to spread it around. On the day of the pour, we cut through a sprinkler sensor wire and had to run a new one afterwards. Lucky, I had put several pieces of PVC under the sidewalk in case I had any future need.
The concrete, which I got from Monster Constructors. They were alright. They mix is as they go with this
GIANT TRUCK. I think their meter runs faster as they tried to charge me for more concrete than I actually used and they came about 3 hours early. We had the 6 of us rotating dumping wheelbarrows and wheelbarrows of concrete and Screet (sp?) it. It was a long day. Overall, it turned out great!
3 Years later
– I love the sidewalk, great for wheeling the trash cans back and forth, I’m sure Ben will like it, and the
neighbors all say it looks real nice.
What I would do different - In hindsight, I would have put roundup down on
where I was going to dig 2 weeks prior, rather than 3 days to starting.
Also, make sure you call 811 to have them come out and mark your electrical
lines.
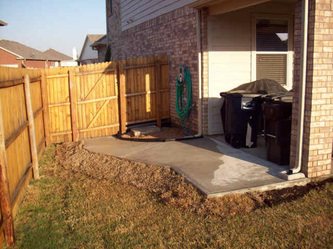
Summer 2008 – Breaking out dog run at Pound’s House
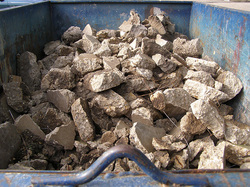
Project: Breaking out dog run at Pound’s House
Price: Blisters
Time: 2 Hours, but it sucked!
Difficulty: Moderate
Tools Needed: Jack Hammer, Two Idiots, and a need for a bigger looking
backyard.
This Project sucked. I know what you are thinking, COOL, I get to use a JACK HAMMER. YOU ARE WRONG. NEVER SAY THAT AGAIN! Jackhammer is hard painful work. Two hours of pain and suffering in
the hot sun with a jackhammer and 30 sq ft of concrete … icky.
1 Month Later
- Learned I never want to jack hammer again and that I respect people who do that
for a living.
What would I do different -
Go to Godfathers for Lunch afterwards.
Project Crown Molding
Project: Crown MoldingPrice:
$ 250 for crown, caulking, and nails
Time: 10 HoursDifficulty:
Medium/hard Lots of thinking and anglesTools needed: 2 miter saws (so you don’t have to keep changing angles, nail gun with 2” nails, caulking, spackling, coping saw, caulking gun
So, how did this project start? Well, Trista wanted crown molding, and I have since painted every room, so I also got paint on every ceiling. So, 2 years ago, I put a 4’ sample up above the fire place. Finally, she was done with my“sample”. So, I almost hired a guy to do it for me, but Janice quilted me into doing it
myself and offered Bruder Jerry as help. So, I picked up the molding. I used a composite molding called timbron molding. I liked them because they are durable, waterproof, mold and mildew resistant, termite proof, zero VOC, and eco-friendly. Most importantly, they don’t bow and warp. So, after spending an hour trying 45 degree angles and coping the joints, we looked in the old crown molding book and set our saws to the recommended settings, and WOW. It worked.
Here they are..
http://www.dewalt.com/us/articles/article.asp?Site=woodworking&ID=2
So, we started in our small bathroom because I figured it would be a good place to mess up. We did it and then started the living room/kitchen/office/entry way. 22 corners mix between inside and outside. We also had some nice straight runs too. With the molding, all of it looked white except one piece we put up, that look white outside, but gray inside. As we moved, we did a scarf joint where the pieces matched up. I only bought 12’ pieces because I think 16’ are too long to move and set. The cutting got a lot better when we had 2 saws set up to cut each miter.
Sorry, this is long winded. Basically, this is a 3 man job. One doing most of the cutting, one nailing, and one doing general holding and running measurements back
Caulking sucks, but if you get one of those caulk smoothing tools, it really makes it look really good. If you can, I would paint after you put it up, or you’ll have to touch up like I did.
I would use the timbron molding again, Dap Alex plus caulk was fine, and we didn’t end up using adhesive.
It was hard work, but it was really worth it. I’m glad I did it. Special thanks to Janice and Jerry. Jerry has the patience’s of a saint and Janice has the patience to put up with him.
What I would do different
– Use the book with molding angles and saw setting at the start. Use 2” nails to start.
Ben's Playhouse
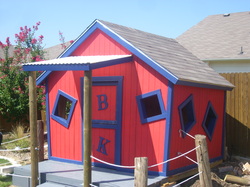
Ben's Crooked Playhouse
Price: $ 750 for All materials
Alright, a couple things... So, first of all... it is a lot
harder to build a crooked house rather then a straight house. The angles are
tougher, the measurements hurt my head. Do I like Ben's playhouse, YES. It
turned out well. You need a framing nailer. I also would suggest using at
least 5/8 think siding rather then the 3/8 I used. However, after I got it a ample bracing on it, it turned
out well. I could fine turn this for a while, but overall, pleased. I was going
to put a metal roof for the porch, but Jerry pointed out that kids like to hang
on it, so, I went with the PVC roofing. If you have any questions, let me know.
The walls and roof are crooked. One side of the roof is longer then the other.
Special thanks to Jerry and Janice.. again.
